

Laying patio slabs is a popular DIY project that can enhance the appearance and functionality of your outdoor living space. However, there are some important factors to consider before starting the project to ensure it is completed correctly and efficiently. Here is everything you need to know before laying patio slabs.
1. Plan and design your patio
Before laying patio slabs, it is important to plan and design your patio. Consider the size, shape, and location of your patio. Measure the area where you want to lay the patio and decide on the layout of the slabs. It is also important to consider the purpose of your patio, whether it is for dining, entertaining, or relaxation. This will help determine the size and shape of the patio.
2. Choose the right materials
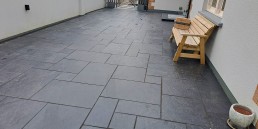
Choosing the right materials for your patio is essential for a long-lasting and durable surface. The most popular materials for patio slabs are natural stone, porcelain, and concrete. Each material has its own advantages and disadvantages, so it is important to choose the right material for your specific needs. Natural stone slabs are known for their unique beauty and durability, while porcelain slabs are low-maintenance and resistant to stains and scratches. Concrete slabs are affordable and easy to install.
3. Prepare the ground
The ground where you plan to lay the patio slabs should be level and free from any debris. Start by removing any existing grass, plants, or weeds in the area. Then, level the ground by removing any bumps or dips. Add a layer of gravel or sand to create a stable base for the patio slabs. The depth of the base layer will depend on the type of patio slabs you are using and the climate in your area.
4. Lay the patio slabs
Before laying the patio slabs, arrange them in the desired pattern and make sure they fit together properly. Start laying the slabs from one corner of the patio and work your way across. Use a rubber mallet to gently tap the slabs into place and ensure they are level. Use spacers between the slabs to create even gaps for grouting.
5. Cut the slabs to size
In some cases, you may need to cut the patio slabs to fit in a specific area or around an obstacle. Use a diamond blade saw or a masonry chisel and hammer to cut the slabs to size. Make sure to wear protective gear such as gloves and eye goggles while cutting the slabs.
6. Fill the gaps
After laying the patio slabs, fill the gaps between them with grout. This will help secure the slabs in place and prevent weeds from growing between them. There are different types of grout available, including sand-based and resin-based. Choose the right type of grout for your specific needs and follow the manufacturer’s instructions for application.
7. Maintain the patio
Proper maintenance is essential for keeping your patio in good condition. Regularly sweep and clean the patio to remove any debris or dirt. Use a pressure washer to remove any stubborn stains or dirt buildup. Apply a sealant to the patio slabs to protect them from weather damage and stains. It is also important to fix any cracks or damages to the patio slabs as soon as they occur to prevent further damage.
In conclusion, laying patio slabs can be a rewarding DIY project that adds value and functionality to your outdoor living space. By planning and designing your patio, choosing the right materials, preparing the ground, laying the slabs correctly, cutting them to size, filling the gaps, and maintaining the patio properly, you can create a beautiful and durable patio that will last for years to come.
